This is a long post so grab a drink, sit back and I hope you enjoy reading this as much as I enjoyed putting it all together.
Drum Roll Please........RENOVATIONS. ARE. COMPLETE!
I could not be more happy with the way it all turned out.
Here is a reminder of the floor plan before and after:
I tried to take all the before/after photos from the same angle so you can notice what stayed the same and what changed. Before photos were taken when we first looked at the house when it was for sale.
We will start this tour with the heart of the home, main hub, the place where everyone gathers...
THE KITCHEN
Eric prefers a kitchen that is tucked away to hide the mess of cooking. I prefer an open kitchen that allows you to interact with others. This renovated kitchen layout met both our preferences.
before
The footprint of the old kitchen stayed the same, keeping the same location of the ovens, cooktop, microwave, sink and dishwasher.
after (ok, Im not going to label every photo "before" or "after"...I'll let you figure it out :)
The bulkhead aka soffit was removed allowing new cabinets to go to the ceiling.
We added a 3 pane casement window over the sink allowing more natural light. The two side windows crank out and have removable screens. The mountain's temperature averages 6-8 degrees cooler than downtown Chattanooga (just 10 miles away), so I anticipate these windows will be open often during the fall and spring months.
The DEEP sink is great for hiding dirty dishes when I am trying to take perfectly staged photos for the blog. hehe
A wall and door was added here, turning the breakfast nook into a mudroom. I have big plans for the mudroom but it will be a DIY project to be completed when time allows. H3 is down to one nap a day so project time is few and far between.
I love the open shelves and my old chippy door.
These iron brackets have a little lip to hold the shelf in place
and gives an industrial look.
This desk/fridge wall was removed and the fridge location moved slightly to be on the side wall.
One of our pups insisted on being part of the blog. Good Boy!
We removed the wall from the former dining room to former living room, along with the chair rail trim.
By simply removing the old window treatments, this window looks so much bigger. We will need to put something up for privacy in the winter when it gets dark early, but for now I like it wide open.
We have been eating breakfast, lunch and snacks at the island.
We use the dining room table for family dinner.
Incorporating this BIG beam into the kitchen cabinets was a bit tricky but I was pleased with how it turned out.
The island countertops have an overhang on three sides allowing comfortable seating for six people.
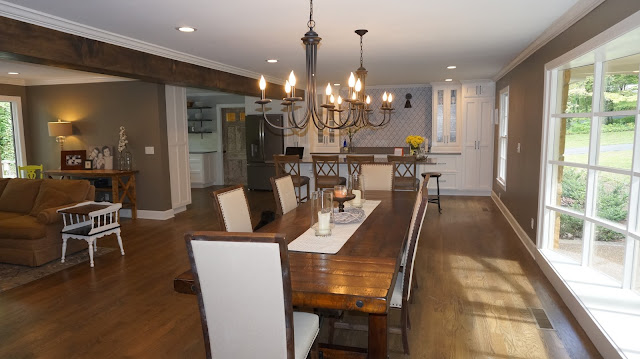
Now the kitchen, dining and living areas are open. It is amazing how a table lamp and a few simple decorations can make a place feel like home.
Whoa, I just noticed in this picture the "X" on the table behind the couch matches the "X" on the bar stools. Cool...I mean..yes, that was an intentional design choice.
Formal living room became our dining room and former dining room became an extension of our kitchen.
This beautiful arched window is my favorite part of the pre-renovated home. It is a beast of a window and will need some type of privacy window treatments eventually.
The antique doors were mounted together and hung on a barn door track.
backside of doors have the original locking hardware
these doors will be open and decorative 99.9% of the time but the track is functional.
this wall won't look so bare when we eventually hang curtains
I white washed the fireplace to tone down the browns & orange stones.
The fence board wood behind the wreath was blending in too much with the fireplace stone, so I white washed it as well and like the contrast better now.
fence board after being white washed
The former breakfast nook is now the mudroom. My observant mother in law noticed the window grids are removable to make window washing easier. I decided to permanently remove the grids and keep the screens off unless they are being used.
I feel like I have brand new windows in this space and the light flows in.
FOYER
The entrance to our home is now light and inviting. We changed the flooring to brick pavers, added Board & Batten trim and painted it bright white, wrapped the openings in stained wood, replaced the carpet runner and added a new light fixture. In other words, we changed everything except the banister and spindles.
chair rail and scrolly loop-d-loops on trim removed
(not sure if I'll keep this little bar cart in the foyer but for now it is out of the way)
original light fixture
I tried to give the original light fixture a makeover. I removed the domes, spray painted the fixture black and replaced the bulbs with vintage Edison bulbs. But when it was hung, I was not happy with the way it looked. Sometimes my DIY projects turn out ok and sometimes they crash & burn. Lights out for this fixture.
new light fixture
Repetition in design make the spaces flow together and look like they belong in the same house.
In the foyer, the openings are wrapped in wood and stained...which match the stained ceiling beam...which match the stained open shelves in the kitchen...which match the wood mantle in the living room.
I'm no professional but I've learned a few design tricks over the years. (thanks HGTV)
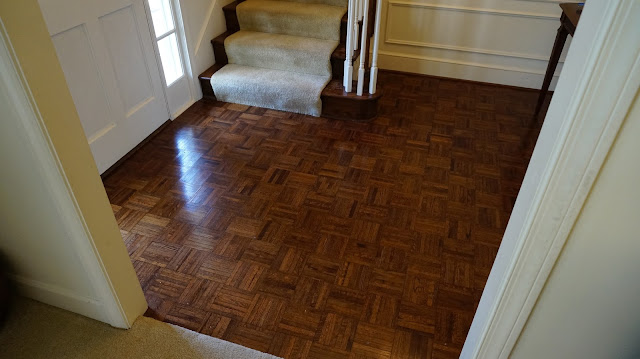
parquet flooring before
brick pavers on herringbone pattern.
We had this flooring installed about 3 months ago. This week, I had two people text me a photo of Magnolia Market's instagram post of their new flooring for their Seed&Supply store: brick pavers on a herringbone pattern. hum, looks familiar!
Magnolia has 1.3M followers on instagram, a successful HGTV show, their own line for furniture, paint, rugs/pillows, a bakery, and 2 stores...BUT as suggested by a friend, Joanna Gaines is following MY blog for tips. hahahaha, riiiight!
interior of front door painted dark gray for a contrast
DETAILS:
They installed a plug inside one of the pantry cabinets for my small appliances and coffeemaker. Countertop clutter is inevitable but this minimizes some.
Beverage station & fridge on far end of the island is close to the coffee maker. All barware, glasses, coffee creamer and drink related items are in this area.
Plug installed on the back of a drawer to hide pesky charging cords.
The rest of the house was clean just long enough for me to take blog photos, but the playroom is a lost cause.
I love this cookbook for recipes and decoration.
Thanks to my Collierville MOPS friends for the gift card to purchase this stand and..
this antique child's seat
perfect for little ones to be at eye level with the adults
on my kitchen window sill (also a gift from my sweet MOPS friends)
I didn't really want to do this blog but so many friends and family were curious about the house renovations and convinced me to document the process. I am glad I did. (thanks for the peer pressure...you know who you are) It has been a lot of fun and I hope you are inspired to make your own space work for you. That could be as simple as rearranging furniture, painting a wall or cleaning out a closet. And if you are working on a project, PLEASE send me pictures. I love to see what you are up to. Our homes should be a place to find rest & bring us joy.
It has been a dream of mine to purchase an older home, renovate it, and make it work for our family and lifestyle. I never thought I'd be living out this dream at age...cough cough...34.
Overall this was a very enjoyable process. The most challenging part was living in a different city than Eric for 4 months. The kids missed their daily interactions with Daddy and so did I. Now that we are all under one roof again, it was worth it.
A HUGE thank you to our contractor Rod, his wife Lisa, and team Daniel, Josh, Raymond, Eric, and Rusty. You treated our home as if it was your own, doing quality work, working long hours and treating us fairly. You have become part of the family during this transformation and you are always welcome in our home that you helped make beautiful. I'm going to need a big stack of business cards to hand out to anyone wanting to remodel.
The contractors are gone but the work is not done. I'd like to tackle the mudroom next and eventually paint the walls and trim of the un-renovated rooms, and phase 2 is exterior curb appeal...eventually! For now, I am ready to kick back and enjoy the rest of the summer before our oldest son starts Kindergarten in the fall. yikes!
As much as I enjoy home design, organization and functionality, at the end of the day, it is not important what color the walls are painted or if the laundry is folded or if the house is clean.
This is life and it can get pretty messy.
I have to regularly challenge myself to focus on what is truly important: 1. My relationship with God. 2. My relationship with my husband. 3. Raising children who are respectful & treat others with kindness.
Sounds pretty simple but man oh man it is easy to get distracted. Our culture teaches us a much different lesson on what is truly important and the ways of this world are easy to get caught up in.
I daily remind myself: Don't complain. Don't compare.
I have so much to be thankful for and comparison is the thief of joy.
From the beginning I said and still stand by:
MOST IMPORTANTLY, through this journey I hope and pray we are able to create a home with lots of laughter, minimal meltdowns (mommy & kids), breaking of bread with glad and sincere hearts (acts2:46), and lots and lots of LOVE!
Time to party!
Lauren & Ware-House Design....OUT! (microphone drop)
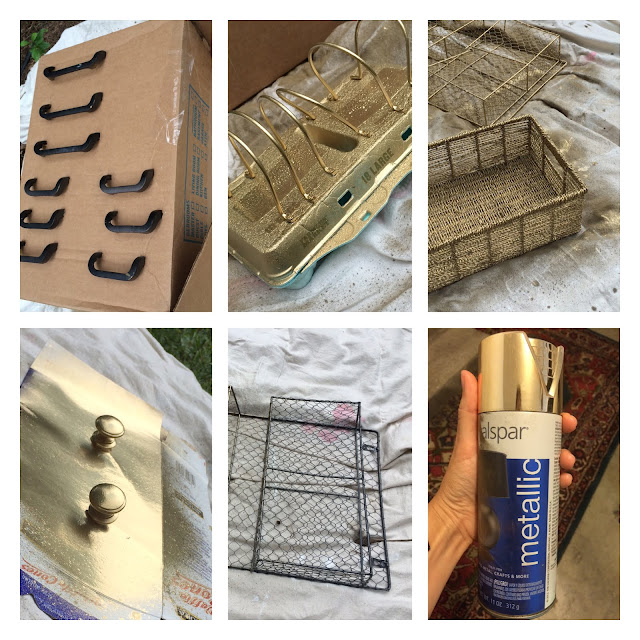
 I wanted a bit of GLAM somewhere in this frat-house. A $4 can of spray paint and BLING BLING- this mama feels fancy. I painted items I already had and they feel brand new. Knobs, basket, file organizer, curtain rod & rings for art wall are now GOLD.


